Thursday, April 12, 2012
HBC SYSTEM Magnetic PDR Roll Tip kit
Instructions for use
1. Highlighting the dent with a line board
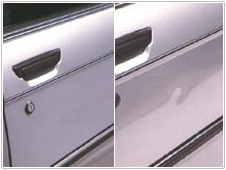
The line board highlights a dent or a high spot by deviation of its reflected lines.
The line board is optional.
To attach the line board first ensure the area is smooth and clean. Whilst pushing the rubber base flat against the point at which it will best reflect the dent, clip the movable suction cup handle down to lock the lineboard base to the panel. (First move the line board’s reflective board about until you get a clear reflection of parallel, black and white lines with a deviation of the pattern ie the dent, toward the centre of the reflection. A dent will be reflected as a widening of the lines and a high spot as a narrowing of the lines)
HIGHLIGHT THE DENT WITH THE LINEBOARD
SEPARATED/SWOLLEN LINES MEANS DENT (LOW)
SQUEEZED LINES MEANS HIGH SPOT
2. Select the bar, tip and extension combination that will allow the best access to the inside of the dented panel. Select tip size according to access available and panel gauge. 19mm Magnet PDR tip tool picks us trace better than 15mm in thicker gauge panels though due to size, will not access all desired areas. It may be necessary to remove trim, light fittings or gain access to a roof by dropping a corner of the headlining.
SELECT SUITABLE TOOL SHAPE AND EXTENSION COMBINATION
3. Use of the door bar
The black foam handled “U” shaped bar is designed to access door skins. Screw on the 15mm Magnet PDR tip tool, wind down window fully, separate glass from outer door skin by pushing the window wedge between them in the middle of the door, where flexibility is greatest. With wedge in place, introduce bar and tip as close to the wedge as possible with tip lying horizontal, ie at the tip’s narrowest dimension, to the opening made by the wedge.
It may be necessary to remove the exterior rubber or plastic horizontal window seal by sliding and or unclipping, to gain better access to the interior.
USE “U” SHAPED BAR FOR DOORS
4. Use of the two straight, red-handled bars. These are designed for panels such as wings, roofs, bonnets and bootlids.
USE STRAIGHT BARS FOR OTHER AREAS
5. Leverage points
Once the tool has been introduced and is in the dent area locate a suitable panel hole in which to hang the “S” hook so that the bar with “O” ring slid over can be hung on the “S” hook to create a leverage point when pushing the bar in the dent area.
It is not always possible to locate a suitable place from which to hang the “S” hook, in which case lever against any part of the surrounding body work which is strong enough, first protecting paintwork etc with suitable padding.
LOCATE LEVERAGE POINT FROM WHICH TO HANG “S” HOOK
6. Surface trace pick up.
Once bar is adequately levered (in the case of the door bar leverage is against the glass, so no further leverage point is necessary, neither are “S” hooks nor “O” rings), offer a surface trace ball to the dented area, moving it around with the fingertips until it is picked up by the tip. Once picked up, slowly slide the tip around by moving the handle until you are comfortable with the movements.
INTRODUCE BAR TO INSIDE OF PANEL IN DENTED AREA
OFFER SURFACE TRACE TO DENTED ARE UNTIL PICKED UP BY TIP
7. Pushing out a typical round dent/ding.
The dent should be pushed out slowly and with minimum pressure to avoid pushing the panel high (see tapping down), and risking the possibility of cracking the paint. Push down on the handle, causing downward pressure on the “S” hook and “O” ring, an upward pressure on the tip against the dent. The general rule is to imagine the dent is a clock face and, starting at one number, follow the order of numbers pushing once on each number until the circle has been completed. You should now see that the dent has decreased in size. It is important to keep the dent regular by maintaining the same pressure for each push and keeping to the circular pattern.
Next move in toward the centre slightly, and repeat. Continue in decreasing concentric circles until the dent has dissappeared or you are left with just the centre. If left with the centre, depending o the depth you may need to push the centre out high before tapping down to finish.
IMAGINE DENT AS A CLOCK FACE. FOLLOW SEQUENCE OF NUMBERS UNTIL CIRCLE IS COMPLETED.
MOVE SLIGHTLY TOWARD CENTRE AND REPEAT.
PUSH SLOWLY AND EVENLY WITH MINIMUM PRESSURE
8. Tapping down.
If you push too hard or need to lift the centre pit of a deep dent, the panel’s metal will stand proud and you will have to tap down,
Using the nylon punch and hammer provided, and following the pinched lines on the lineboard , gradually tap down the highs created.
It is important that you tap down a high as soon as you create it otherwise irregularity will occur and confuse the dent’s reflection, making it much harder to read and so remove.
IF YOU GO HIGH, TAP DOWN BEFORE CONTINUING
9. Flatting and polishing.
After removing a dent the surface may appear “pock marked” from numerous pushes.
These can me removed by flatting with 2000 wet and dry, before polishing.
FLATTING AND POLISHING CAN REMOVE MINOR SURFACE IRREGULARITIES
10. Maintain Magnet PDR tip tool kit clean and lightly lubricated with oil, grease or vaseline.
MAINTAIN MAGNET ROLLER TIPS CLEAN AND LIGHLY LUBRICATED
SUMMARY
1. HIGHLIGHT THE DENT WITH THE LINEBOARD
SEPARATED/SWOLLEN LINES MEANS DENT (LOW)
SQUEEZED LINES MEANS HIGH SPOT
2. SELECT SUITABLE TOOL SHAPE, TIP SIZE AND EXTENSION COMBINATION
3. USE “U” SHAPED BAR FOR DOORS
4. USE STRAIGHT BARS FOR OTHER AREAS
5. LOCATE LEVERAGE POINT FROM WHICH TO HANG “S” HOOK
6. INTRODUCE BAR TO INSIDE OF PANEL IN DENTED AREA
OFFER SURFACE TRACE TO DENTED ARE UNTIL PICKED UP BY TIP
7. IMAGINE DENT AS A CLOCK FACE. FOLLOW SEQUENCE OF NUMBERS UNTIL CIRCLE IS COMPLETED.
MOVE SLIGHTLY TOWARD CENTRE AND REPEAT.
PUSH SLOWLY AND EVENLY WITH MINIMUM PRESSURE
8. IF YOU GO HIGH, TAP DOWN BEFORE CONTINUING
9. FLATTING AND POLISHING CAN REMOVE MINOR SURFACE IRREGULARITIES
10. MAINTAIN MRT TIPS CLEAN AND LIGHTLY LUBRICATED
Thursday, February 23, 2012
PDR Technology
PDR Technology stands for Paintless Dent Removal. This technology was born in the USA and Germany thanks to the invention of the new flexible paint for cars. Flexible and still strong coating is preserved even when the metal of the car is damaged and this allows to remove the dent on the car without repainting the whole part of it.This technology is very convenient, economic and profitable. As soon as it appeared, it changed completely the concept of body shop repair, which requires much more efforts, time and most important – money!
The difference between standard body shop repair and PDR technology
When using PDR Technology:
1. You don’t need to repaint the part of the car, as the original paint is preserved.
2. You don’t need to dismantle or dismount the parts of the car
3. You don’t need to use the filler (usually), abrasive materials and other chemicals
4. The cost of such repair depends on many things but the final price is at least 2-3 times lower than standard body shop repair with painting.
How this innovative technology works?
With the help of special instrument the skilled worker removes the dent from the inside of the car. For this kind of job he uses the instruments of different shape, length and thickness. If the dent is small and round (as from the hail) the Slide hammer system is used. This system is so-called “glue” system that allows to remove the dent from the outside, that is much faster and easier.
Due to the appearance of such instrument the worker do not need to dismantle the car any more!
The process of removing the dent consists of several important steps:
1. The worker determines the position of the dent, the way he can reach it and also on the request of the customer estimates the approximate price of such repair.
2. The worker picks up the suitable instrument for this kind of job, fits the light and starts working with the dent.
3. An average repair takes 15-30 minutes. After finishing the removal of the dent, the worker fixes the possible defects if any, and returns the car to the customer.
15-30 minutes all in all and the dent is away as if never to be there before. What is more: both you and your customer are satisfied!
But! With this easiness and quickness one should bare in mind that it is not always possible to do such kind of repair.
Firstly, this technology is applicable only in case when the paint of the car is not damaged. Otherwise after removing the dent you will still need to do the spot repair ( it is possible with the system C from HBC System) and renovate the paint locally.
Secondly, when the metal is damaged hardly you won’t be able to remove the dent leaving no trace, because the metal is stretched and its surplus will be visible anyway.
Thirdly, it is not recommended to fix the dents on the cars that have the paint coating of poor quality, for example some cars more than 15 years old, and also the cars that were repainted in the body shop before.Nevertheless you have a lot of potential customers, as the amount of cars on the roads is growing unceasingly and nobody is secured from some accidents on the roads as well as from the whims of nature, for example hale.
This technology appeared on the Ukrainian market not so long ago and grows in popularity very rapidly. It is a source of profit for private entrepreneurs, who wish to start their own business. This business doesn’t require huge investments. You invest money only in good instruments, but your major investment is your time, desire and skills.
This technology also attracts the attention of the professionals, who deal with selling used cars, as dealer centers. The question of removing the dents from the car spending little time and money is more than urgent for them.
The choice of the tools
Answering the question “What is the most important in working with this technology?” the professionals will say for sure that it is the level of the worker’s skills combined with the good and qualitative instrument.
The choice of the tools is a very important step. The main criteria that one should keep in mind while selecting the tools are described here.
The material
The material from which the tools are made is very important. It reflects on the price, quality and durability of the tools. The tools can be made of ordinary steel (that normally rusts), chromed and made of rustless steel. The instrument made of ordinary steel is, of coarse, cheaper, but it won’t serve for a long time, what is more you will have to leave aside the expensive cars, and it is these cars, that are your potential customers.The PDR tools made by Danish company HBC System are made of rustless steel that on the final stage is polished and the instruments acquires the nice and shiny look, that is preserved for many years unlike the chromed instrument that looks nice only when you buy it. HBC System produces the tools from high-carbonate steel and this instrument has been tested for hundred times by workers and also metal laboratories. HBC has the homologations from the car producers all around the world, such companies as Mercedes and Porsche already made their choice in favour of HBC System.
Quality
Except the material the process of producing the tools is very important too. The tools produced by HBC System undergo 3 stages of heat treatment. The points of the instruments are forged and do not distort with the years of usage. Very important is that the middle part of the instrument only bends but do not twists. Because the worker works from the inside of the car he doesn’t see directly where and how hard he pushes, that is why it is so important that the tool works as the continuation of his hand and reproduces the efforts the worker makes.. When the instrument twists in the middle it is very difficult to control it, there is a danger to push too hard or at the wrong place and to spoil all the work done. If you made your mind to work with this technology start with the quality of the instrument.Sets of instruments
While choosing the instrument one should remember that a universal kit doesn’t exist. In the process of working everyone finds his own tool, which he likes. All the PDR tools proposed by HBC System can be generally subdivided into 2 kinds: main and special. Main tools are the tools that are invented to deal with the most common types of dents and to solve the most common problems. At the same time the special tools are created to help you in more problematic cases where the main tools are not the thing you need. More description you will find in this catalogue.
Cost of the tools
Tuesday, February 21, 2012
Caravan Repair with HBC System E Step by step
Caravan Repair with HBC System E – Step by step
- Check the dent (there may not be any areas there are to high.)
- Knock down edges/kanter so the overgang/transition of the dent becomes slanting/skrå, about 45 degrees.
- Grind the damaged area until the paint is gone. You can use a wire brush.
- Clean the dent and the area were the copy is going to be taken. Clean with E-cleaner.
- Measure the dent on the plate/caravan. Check the fixed points several times.
- Fit the niveau rail by applying an appropriate layer of mouldmaker on the back of it. Make sure that the injection hole is in the centre of the damage.
- If it is upgrade: Check the fixed points and fit the niveau rail with vacuum.
- Fasten the vacuum tool. Fit the vacuum tool on top of the niveau rail.
- Check if there is space between the niveau rail and the vacuum tool. Check fixed points.
- Copy: Fill mouldmaker in the hole slowly to the edge. 2cm larger than the damaged spot. Pull up the mixing tip slowly to avoid air pocket/a hole.
- Take the vacuum tool of the plate/caravan. You can use a palette. The copy is done. Press out the air lightly.
- Forskyd/displace,place the vacuum tool/copy to the dent efter fixed points. Check the space between the niveau rail and the vacuum tool.
- Mix the støbemasse (E-filler and hardener.) ½ pipette, ½ HBC mixing jar at 20 degrees.
- Fill the injector. Make sure that there is no air in the injector.
- Cut of the prop/top of the copy. Important: Place the needle in the middle of the copy and inject the e-filler very carefully while at the same time twisting the injector/needle to avoid air in the cast.
- Remove the needle at the first sign of e-filler next to the mould. Carefully keep on filling while the needle is being removed, to fill the hole in the cast.
- If it needs more filling: Leave the needle in and fill the injector.
- The hardening time is 30 minutes at 20 degrees.
- Grind with the glass pen.
- Apply the Primer between the repair area and the plate.
- Spray carefully the area with primer and grind again. Avoid spraying too much into the middle of the repair.
- Regrind with the glass pen if necessary.
- Apply the right caravan colour. Warm up the area to 50 degrees to speed up the curing process.
- Apply fade thinner in the mat area (in the rim zone). Bruges til at fjerne sprøjtestøv. The fade thinner dries in 10 minutes, so wait and see the result before applying more fade thinner.
- After a couple of hours you can polish if needed.
Good advices:
- Clean the tools after use.
- The vacuum tools are going to be placed right after use to avoid damages on the gasket.
- Good light.
- You can use a palette or fishing line to get the copy/vacuum tool of.
- Avoid taking of the vacuum tool to fast, when you have made the copy.
- There may not be any air in the injector with e-filler.
- Mouldmaker: Leave the mixing tip on for next time. Change the mixing tip before you use it again.
- Painting with aerosol: Press or don’t. Remember to spray before use.
- Important:
Clean the plate on the caravan.
Clean the caravan tools in hot water.
Clean the plate on the caravan.
Clean the caravan tools in hot water.
Friday, January 27, 2012
Updated Colour Formulations - System B3 Aqua
We have updated our B3 Aqua Color Mixing System with a brand new updated mixing book (colour formulations)
The new pdf. file can be downloaded from our official HBC website by registered users here
If you have purchased a HBC system and would like to register please view our guide on how to register your system here